

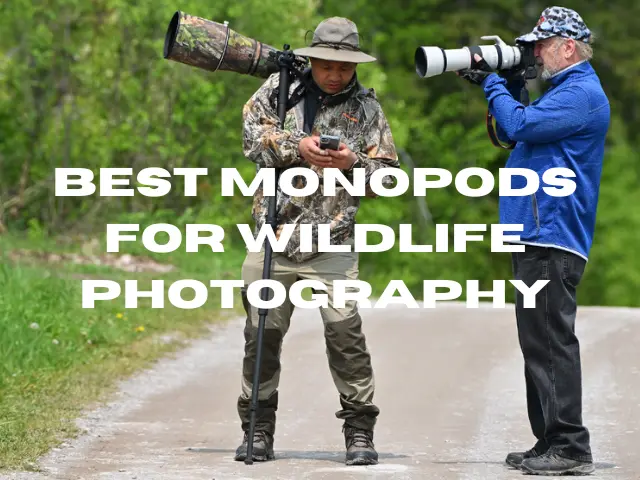
There is no dispute in the fact that holding your camera steady is frequently necessary while photographing animals. Wildlife photographers employ telephoto lenses, which are bulky and challenging to hold for a lengthy amount of time. If you cannot increase your shutter speed to that of a cheetah or be protected by vibration reduction, they are also vulnerable to camera shaking. Additionally, even though you are free to handhold the camera occasionally, you don’t want to do that all the time.
Your photo shoot can begin at daybreak and last well until dusk if you want to use the best lighting. You must be able to capture clear, noise-free photographs even when shooting in poor lighting circumstances. With the camera stabilized by a monopod, you can capture vivid and lovely images of animals by using shutter speeds that are slower and lower ISO settings. In essence, it gives you additional chances to be imaginative and pay attention to composition. What is a monopod, and how can you choose the right one for your equipment for taking pictures of wildlife? Let’s investigate!
Tripod vs Monopod
To a tripod’s three legs, a monopod has just one leg, as the name suggests. A monopod can be hung from a bag or even the wrist when not in use. You can deploy it at a moment’s notice thanks to telescoping portions that can be folded up when not in use. Even though it won’t offer the stability needed for extremely long exposures, it’s fantastic to give yourself a little wiggle room with shutter speeds when you need it.
There are many uses for a tripod. It is merely a portable stand that can be used to maintain camera stability when shooting at slower shutter speeds. It’s a strategy to ensure sharper images. But a tripod can also be a helpful composition tool. You consider the shot you’re taking more carefully and deliberately when your camera is mounted on a tripod.
Benefits of a monopod
- swift and adaptable
Photographers of sports frequently use monopods. Once your camera is attached to the monopod head, you won’t ever need to take it off. A monopod sets up quickly. At the far end of the pitch, something is occurring. No issue! Take your complete setup and run to the place. You won’t have to worry about running into people or other photographers because monopods are much slimmer than tripods. Additionally, monopods are considerably easier to take around than tripods because of how much lighter they are. In reality, by supporting your heavy lenses, a monopod will help you avoid weariness.
- Improve additional stability and support.
Instead of only shooting handheld, monopods give you additional support while utilizing large telephoto lenses for prolonged periods. They work well for giving video footage more steadiness. A monopod has several benefits over a tripod. Based on the model, they are typically less expensive, smaller, and easier to transport.
MORE POSTS: Best Camera for Wildlife Photography Beginners
Benefits of a Tripod
- Stability
Tripods are more stable since they have three legs. Longer exposures can be captured using a tripod than with a monopod. A monopod will help with camera shake reduction. But for taking exposures of a few seconds or even minutes, tripods work best. Even with a tripod, wobble can be caused by wind or even bad construction. But the most reliable camera supports are still tripods. You can leave a camera on top of a tripod and walk away thanks to its design. If you use a monopod for this, your camera will essentially eat dust.
· Where should you use a monopod?
- Simple use
The best use for a monopod is as a temporary holder for your camera and lens. It makes the camera shake less likely and is more stable than hand-holding. You can immediately mount the camera or lens to the monopod or, for greater flexibility, add a lightweight tripod head.
- Enabling telephoto lenses
A monopod is a wonderful substitute for a tripod if you use a heavy telephoto lens because a tripod can be difficult to put up, especially in confined spaces. A monopod, like a tripod, supports the entire weight of your equipment but allows for more flexibility for shooting sports and animals.
· When to use a tripod?
- Choice of settings
You have better control over the camera settings while using a tripod. You can focus much more precisely and utilize a smaller lens aperture and a lower ISO. The shot may mostly resemble one taken when shooting handheld, but it will be of higher quality, with more control and delicacy.
- Motion blur, time-lapse, and nighttime photography
Certain shots always call for a tripod. Time-lapse movies and long exposures are excellent examples. The only way to ensure that the camera is precisely stationary for several seconds or minutes at a time is to use a tripod.
Both tripods and monopods can be useful tools in a photographer’s toolbox because they provide a lot of support for your camera. However, there are a few circumstances in which a monopod excels above a tripod and vice versa.
We particularly advise getting a monopod if:
- You frequently photograph in situations when quickness is essential
- You want to give your arms a break because you work with lengthy lenses.
- You want a little bit more steadiness but don’t want to take long exposure pictures.
- You want to slightly lower your shutter speed without having any problems because you are working in low-light conditions.
On the other hand, we would suggest getting a tripod if:
- You want to take pictures with a long shutter speed of landscapes, cities, or the night sky.
- You don’t mind moving more slowly when working.
- You’re prepared to shell out a sizable sum for a high-quality item.
- You must take several pictures with the same frame.
How to use a monopod?
The method is straightforward. Attach your camera to the monopod top, extend the legs till they go, lock them out, and then raise them to the desired height to take the photo. Since the camera isn’t in your hands, you’ll need a way to ‘trigger’ it. You can do this by using a Bluetooth or cable remote trigger. You can also put your camera in timer mode so that it takes pictures periodically.
You can also use your Smartphone to wirelessly connect to your camera and create a “remote screen” if you can balance the monopod on one hand.
Additionally, when you hold your camera aloft and go to interval shot mode, your camera will automatically take a series of subsequent pictures, considerably increasing the likelihood that one of your shots will turn out. If you’ve bought the nicest monopod you can afford, you should be able to get high enough to take pictures that nobody else will probably be able to match.
MORE POSTS: 5 Best Finger Toothbrushes for Small Dogs
Best Monopods for Wildlife Photography in 2023
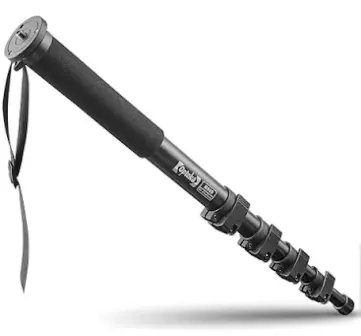
1. Opteka Ultra Heavy Duty Monopod
The Wimberley MH-100 MonoGimbal Gimbal Monopod Head has just won an honor. You need this head if you use a monopod with a lens that has a tripod foot. The Wimberley MH-100 MonoGimbal Gimbal Monopod Head has a unique side-mount gimbal head that makes using the largest and heaviest lens on a monopod simple.
It is small and light while being incredibly durable performs extremely smoothly, and is comfortable to use. Many photographers choose to use a monopod with a gimbal head as an option. With this kind of head, the balance issue can be resolved by putting the lens beneath or next to the pivot point.
Features:
- The ability to spin your lens around its center of gravity allows you to control very large lenses with ease.
- For use with QC clamps, the base has integrated Arca-swiss dovetails and optional safety stop screws.
- Fasteners made of anodized 6061 aluminum and body stainless steel
- A thick stainless-steel shaft that rotates 360 degrees and has a huge, rubber-coated, large-lobed lock knob connected to it smoothly travels on a radial roller thrust bearing.
Benefits:
Under typical use, the MH-100 design is extremely straightforward and requires no maintenance. If disassembly is required due to exposure to a lot of saltwater, sand, or other grit, it is doable.
The clamp is placed so that it is unlikely to come into contact with the monopod mounting platform or a clamp affixed to the platform. Even when oriented straight down, the majority of lens and tripod foot combinations will clear the monopod. The locking knob also provides some friction control on the fore/aft tilt, which is another advantage of this design over the conventional monopod head design.
Any monopod with a 3/8-16 stud on the top can be used to mount the MonoGimbal because it has a bottom hole that is 3/8-16 threaded. To attach it onto a 1/4-20 stud instead, you can also insert a reducer bushing into the 3/8-16 hole. We recommend using a small amount of blue Loctite to keep the accessory secured in place if it is intended to be a permanent addition.
2. IFOOTAGE Cobra 2 Monopod
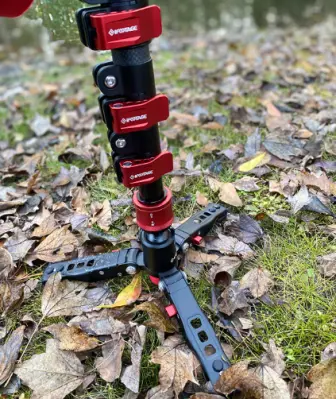
The adaptable 2.8 kg Cobra 2 C180-II Carbon Fibre Monopod from iFootage steadies your camera so you can take still photos or videos, and it swivels easily. The 4-section monopod, with a load capacity of 22.1 lb and can be extended from 27.8″ to a maximum height of 70.9″, can be extended by disengaging its flip leg locks.
The base at the bottom extends to three feet and features a swiveling base with tension adjustment and a lock that makes it simple to follow a subject while filming. The rubber foot is visible when the feet are folded up, allowing the monopod to be used normally without a swiveling base. Additionally, being detachable, the base functions as a miniature tripod that can be used for macro or tabletop photography.
Features:
- The monopod has been reimagined by iFootage, giving you access to yet another crucial piece of camera support gear.
- You can move quickly with the iFootage Cobra 2 series thanks to its distinctive, quick lock mechanism.
- High-end products constructed from aluminum tubes
- Lock by pushing and then click. Three angles of adjustment are provided for the low-profile tripod.
- It combines the low-profile tripod, alpenstock, and monopod into one.
- Simple to change its functions
- Design with four modular parts
- Patented rapid-release systems that operate with one hand are top and bottom
- Dual 1/4 and 3/8 mounting
Benefits:
- The primary body comes in carbon fiber or aluminum, and when deflated, measures just 43 cm. It is extremely portable and extensible to 120 or 180 centimeters. It comes with a special buckle design that is incredibly simple to operate with one hand.
- Release mount quick: This monopod’s spring-loaded mount point, which works with 1/4 and 3/8th threads, is one of our favorite features. Pulling the red collar will allow you to insert the quick-release mount.
- Roll-away rubber foot typically fits nicely underneath the Low Angle Camera Pod. However, it can be unscrewed and attached to the bottom of the main body to create a more compact, portable monopod.
- Low-angle quick-release camera pod: This is the favorite feature and the area of the system where one uses it the most. The monopod’s folding legs can be detached and used separately as a low-angle tripod using the same quick-release mount point. Its ball joint tilts to a 90-degree angle.
3. COMAN Professional Monopod
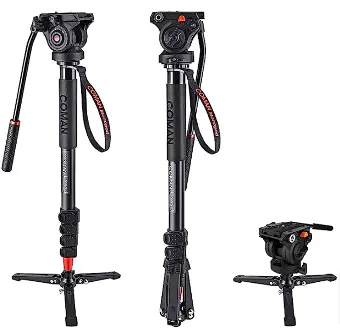
This monopod kit is crafted from high-quality aluminum, making it lightweight while still capable of holding up to 13.2 lbs. It’s compact and easy to travel with, as it folds down to just 26″ in length and weighs only 3.9 lbs. This makes it perfect for fast-paced situations like sporting events and outdoor shooting.
The monopod base swivels 360°, tilts 45° in all directions, and can quickly switch between landscape and portrait modes with its 90° drop-notch feature. The detachable base can also be used as a small table-top tripod and locks securely in the upright position with its patented Vertical Lock.
The camera monopod is suitable for SLR, DSLR, Video Cameras, and Camcorders up to 13.2 lbs. The 5-section aluminum monopod leg extends up to 73″ and has an ergonomic flip lock for quick and easy leg extension. Additionally, the tightness of each flip-lock can be adjusted using the supplied Y-style key to meet specific requirements.
Features:
- Better build quality
- Versatile setups/functions
- Lightweight but not breakable.
- Comes with a few tools and extras
- The carrying case comes with a convenient adjustable strap.
Conclusion
Photographers of wildlife understand the value of a good camera and angle. Animals cannot be asked to rest, unlike people. A bad picture may cause you to miss an important moment that cannot be repeated. Tripods and monopods are tools that can simplify your life in the forest. Since it is a costly investment, you must put some thought and effort into it before deciding.
Resource links
https://www.naturettl.com/best-monopod-for-wildlife-photography/
Priyanki Baruah
Latest posts by Priyanki Baruah (see all)
- Best Monopods for Wildlife Photography in 2023 - October 16, 2023
- Everything You Need to Know About Sabertooth Longhorn Beetle - April 8, 2023
- How much does a baby hippo weigh? - September 19, 2021